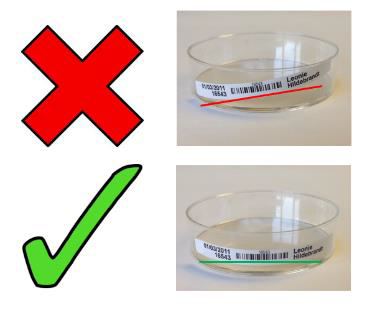
1.- Dishes:
• Use a dedicated dish label.
• Ensure you have applied the labels so that the barcode is visible and straight.
• Ensure the labels are consistent across all of the dishes.
• With fold under labels, apply the barcode part first, then fold the clear part underneath.
• Ensure the text is not obscured and does not obscure microscopy.
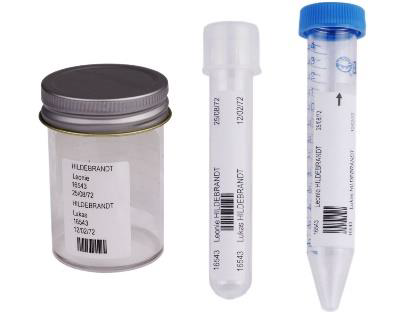
2.- Tubes:
• Use a dedicated tube label, taking care to get it straight.
• The black arrow should be pointing towards the top of the tube (upwards).
• Bottom of label should be positioned as close to the conical part as possible.
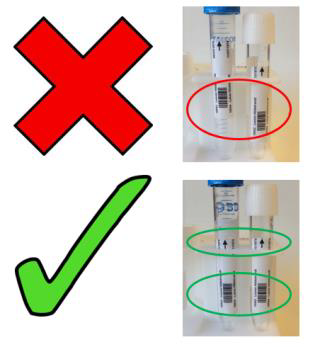
3.- Straws:
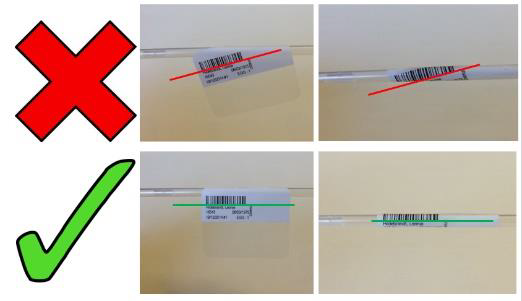
• Use a dedicated straw label, taking care to get it straight.
• Ensure you peel off the labels carefully.
• Apply the labels ensuring the barcode and patient details are visible and straight.
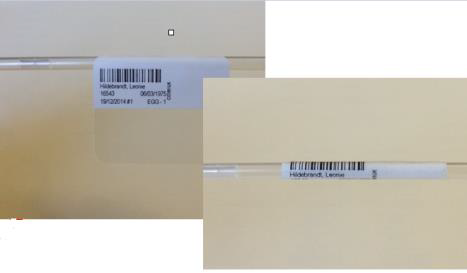
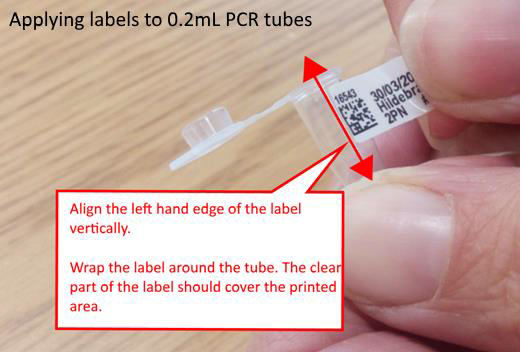
4.- PCR tube labels:
PCR tube labels are curved to deal with the tapering tubes (they are larger at the top than at the bottom).
PCR tubes can be applied to both 0.2mL and 0.5mL PCR tubes, although the method of application differs slightly for each to ensure adequate lamination to the printed text and barcode.
The method of application for each is shown below:
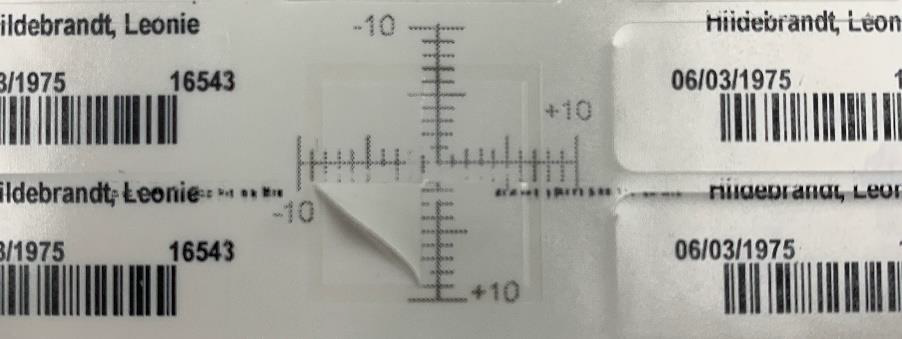
• Repeat the above steps if the label alignment requires further adjustment.
Individual report alignment settings can also be changed by going to Settings from the user settings dropdown menu and clicking on Clinic, Edit and the Reports icon.
![]()
• Double click on the desired report.
• Adjust either the Horizontal or Vertical margins.
• Click Save to update the changes.
Comments
0 comments
Article is closed for comments.