
To plug in an IVF Benchtop Matcher device please follow instructions here:
When plugged in follow these steps to manually configure IVF Benchtop Matcher device to the system:
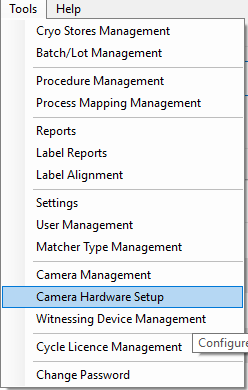
Logon to the Matcher application, select 'Tools' from the main menu at the top of the page, and then select 'Camera Hardware Setup'.
In the Camera Hardware Settings pop up window make sure camera 1 is selected from the 'Camera' drop down menu, then select the camera button at the bottom of the window so you can identify from the photo it captures whether that camera is for the 'left dish', 'right dish' or is the 'tube' camera.
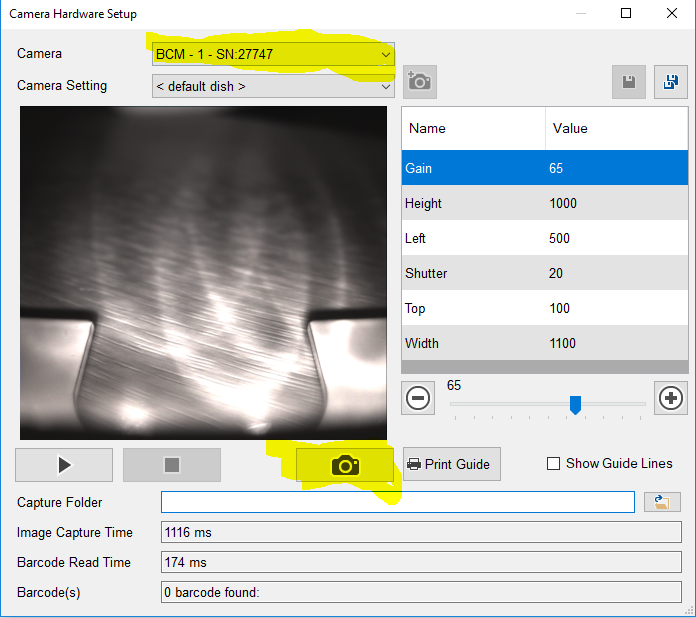
When identified, select the 'add camera' button.
 S
S
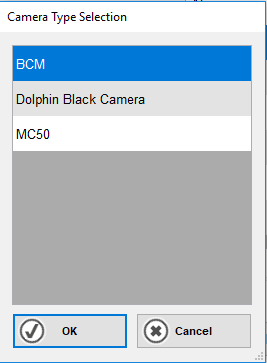
Select 'BCM' from the menu, then click 'OK'.
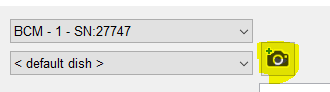
If it is a 'left dish' or 'right dish' camera, select '< default dish >' in the Camera Setting, and then select the button on the far right to 'Create a copy of these settings'

If it is a 'tube' camera, select '< default tube >' in the Camera Setting, and then select the button on the far right to 'Create a copy of these settings'

Then in the next pop up window, in the Name field use the following naming convention:
- If Left Dish: Name 'L1', Mode Type 'Dish'
- If Right Dish: Name 'R1', Mode Type 'Dish'
- If Tube: Name 'T1', Mode Type 'Tube'
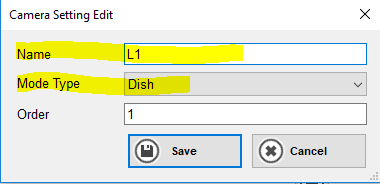
Select 'Save'
Then select 'Create a copy of these settings' again, to create a second set of settings which allows the cameras to adjust for different lighting and barcode conditions.
Then in the next pop up window, in the Name field use the following naming convention:
- If Left Dish: Name 'L2', Mode Type 'Dish'
- If Right Dish: Name 'R2', Mode Type 'Dish'
- If Tube: Name 'T2', Mode Type 'Tube'
Select 'Save'.
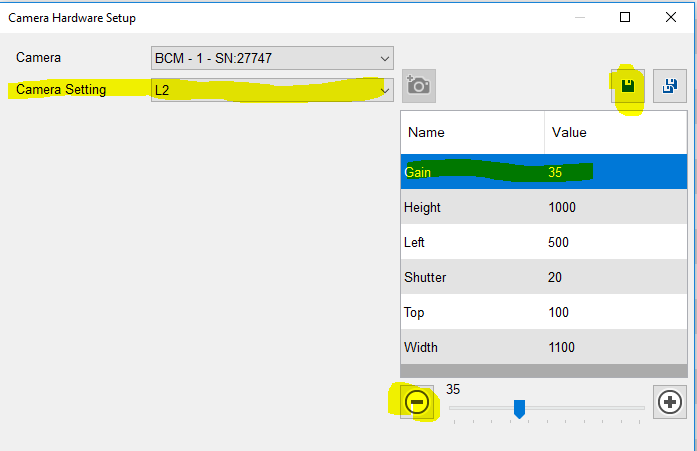
Then in the Camera setting select camera setting 2 for example "L2". Select the 'Gain' setting on the left side and set it to '35', then select 'Save' as shown below.
Repeat this step for the other two cameras.
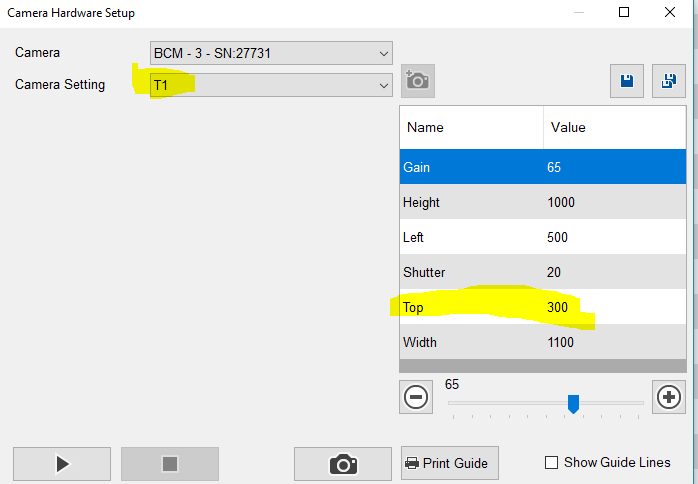
**IMPORTANT WHEN CONFIGURING DISH CAMERAS MAKE SURE THE 'TOP' SETTING IS '100', BUT FOR TUBE CAMERAS SET THE 'TOP' AT '300'***
Where all three cameras have had their settings added make a note of the camera serial numbers and which number corresponds to which camera type (left dish, right dish or tube).
For example:
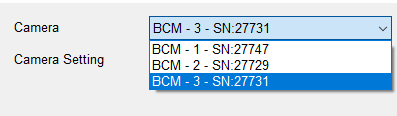
- BCM - 1 - SN27747 = Left Dish Camera
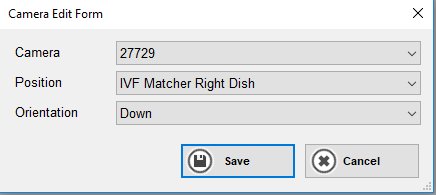
- BCM - 2 - SN27729 = Right Dish Camera
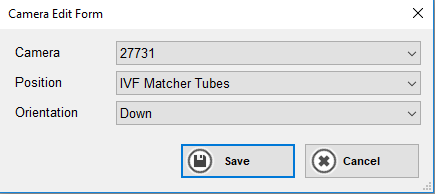
- BCM - 3 - SN27731 = Tube Camera
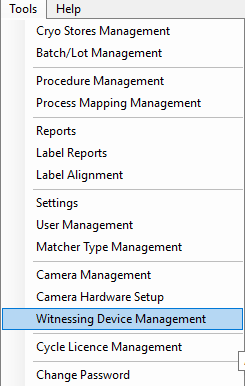
Then within the main menu, navigate to 'Tools' then 'Witnessing Device Management'.
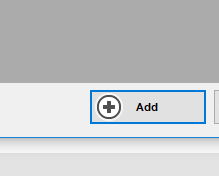
On the next window select 'Add'
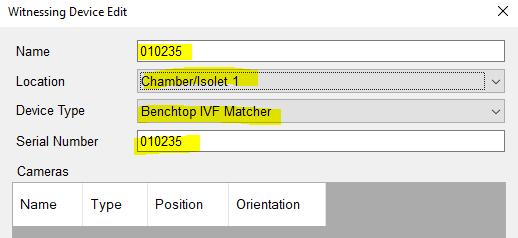
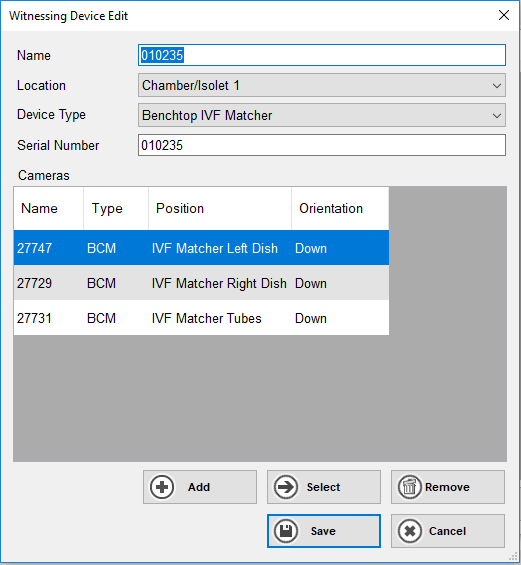
Then in the next pop up window enter the Asset Tag number (located on a silver label on the bottom of each Benchtop Matcher device) into the Name and Serial Number fields. Select 'Device Type' as either 'Benchtop IVF Matcher' or 'Benchtop Andrology Matcher' as appropriate. And select the Location where the device is being positioned.
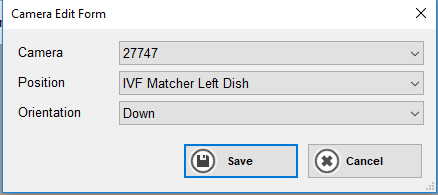
Then select 'Add', select the Camera serial number from the first drop down list, select the 'Position' of camera you noted earlier, and finally set the 'Orientation' to 'Down', then select 'Save'.
Repeat for other two cameras as shown below.
When all three cameras have been added, select 'Save'.
The Benchtop Matcher device has now been successfully added to the system ready for witnessing.
Comments
0 comments
Article is closed for comments.